Abendsterns bench work was completed more than three years ago, much before this blog came into existence, and therefore I have no pics of actual construction. However, I will attempt to recreate the process of bench work erection thru some illustrations since the entire bench work was planned on 3rdplanit along with the track plan.
The main wall supports are 2×2 lumber pillars with 2x1s cantilevered in a manner so as to form the support arms for the sub roadbed, fascia and valance……
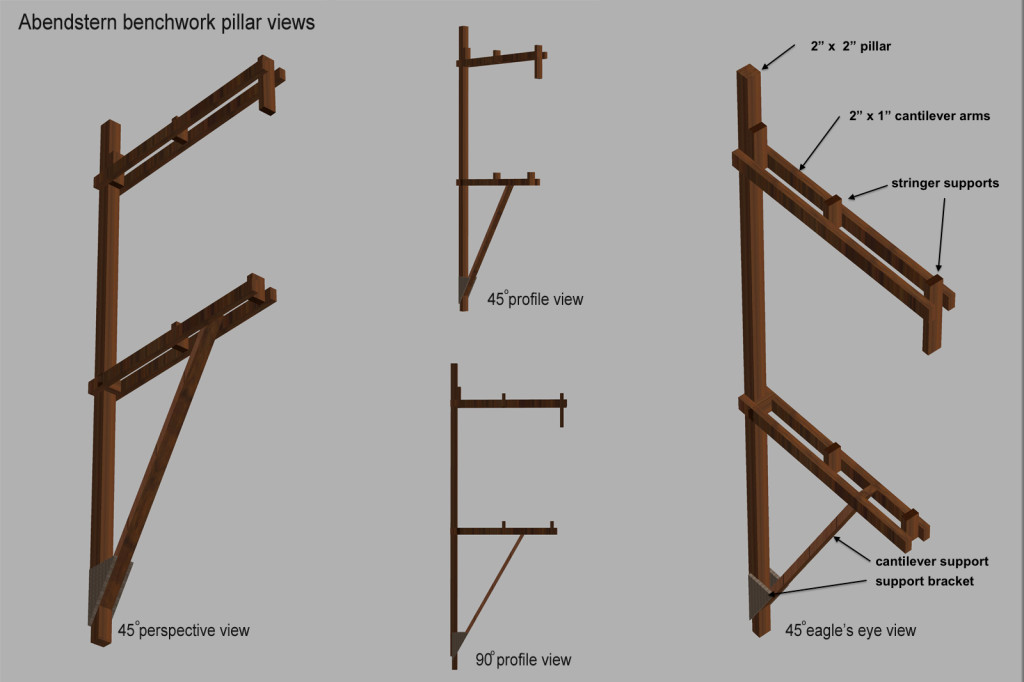
2×1 Stringers are then screwed on to these arm supports to form a sort of open grid benchwork .
The valance, fascia and backdrops are then attached to the cantilevered arms and outside stringers …..

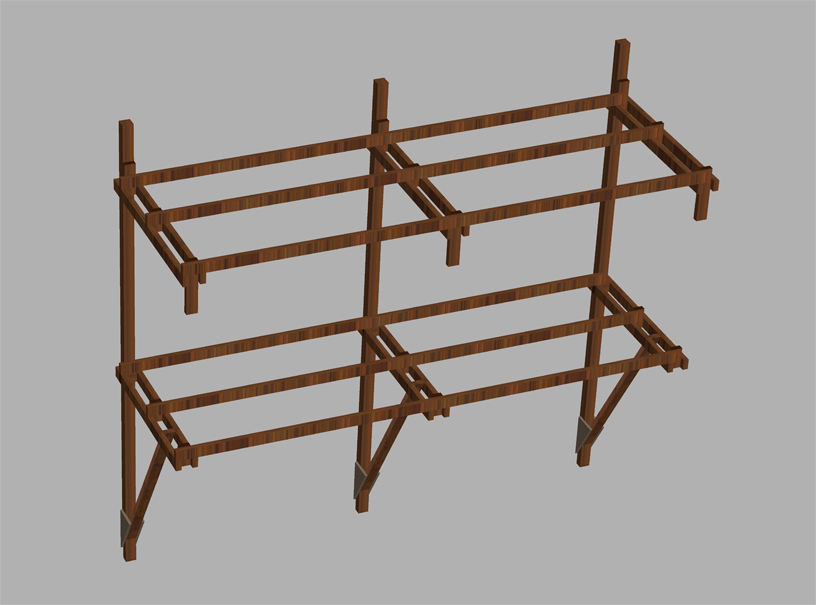
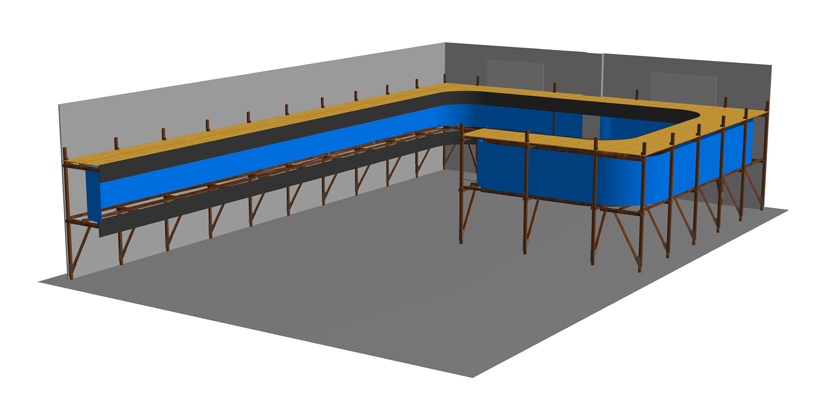
Below is what i had in mind prior to the actual construction …… some wall sections and the staging yard trackage has been removed for clarity ….
The benchwork design called for around 30 pillars/cantilevered arms and it was critical to the design that there was no variance in their specs/ dimensions so i made a couple of jigs to setup an assembly line of pillar making which greatly helped accuracy and sped up matters……
here is the jig setup for the upper cantilever ……..
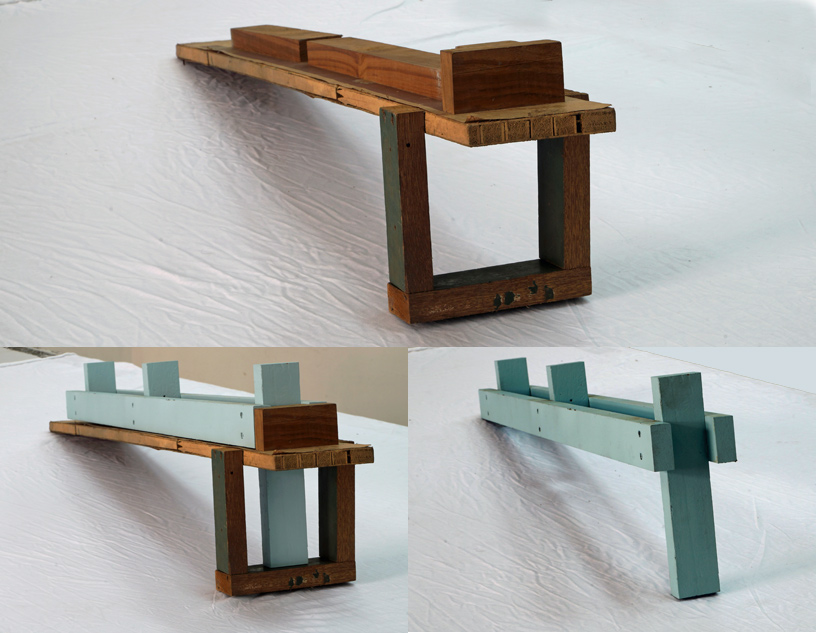
and one for the lower cantilever …..
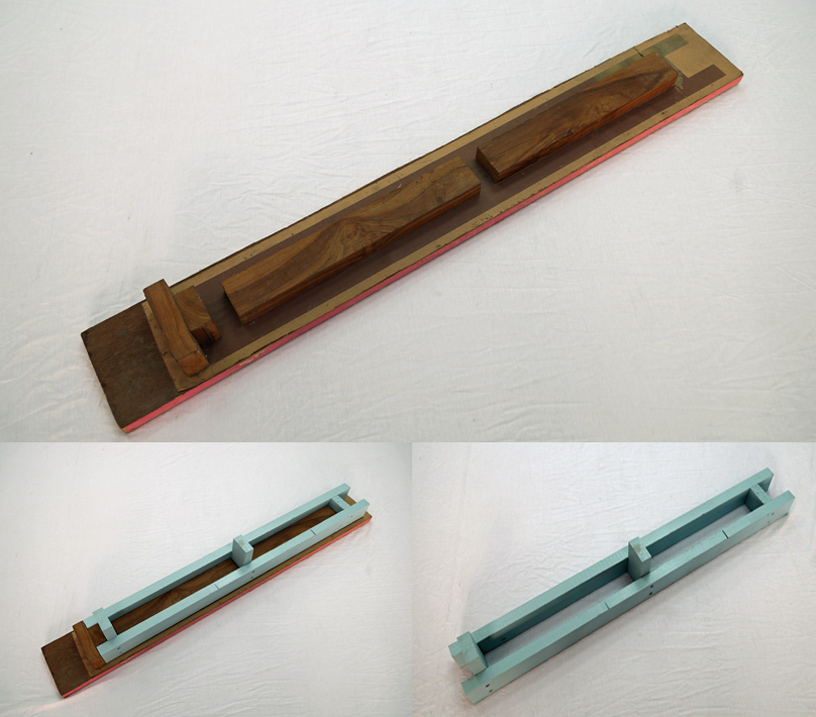
finally a large jig for the 2×2 pillar itself alongwith the cantilever arms ……
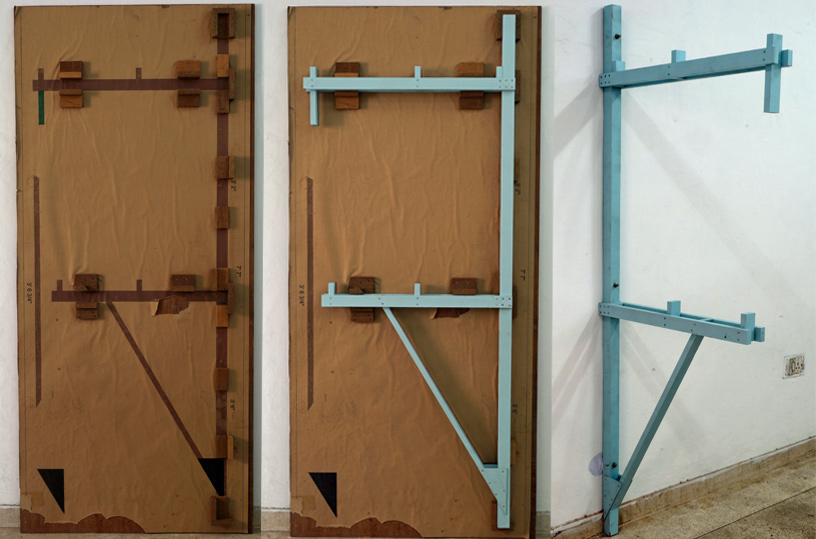
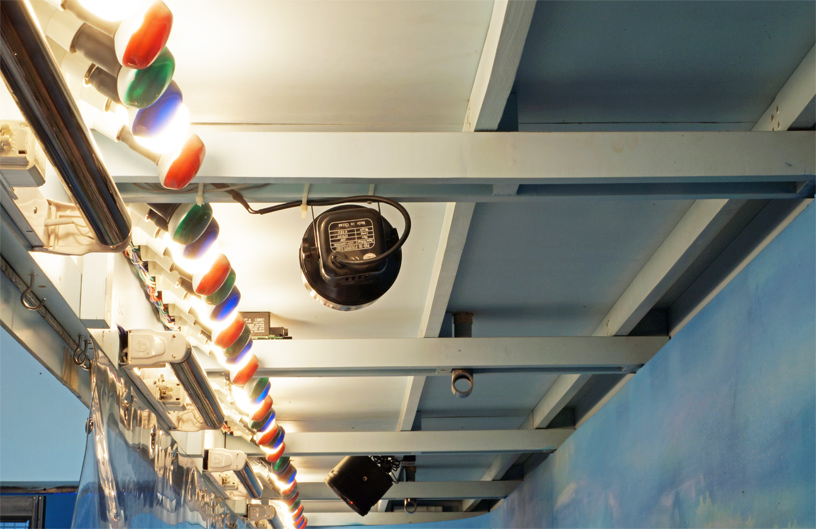
the 2×2 pillars form a nice anchor point for wiring channels/racetracks as well as electrical sub panels …..

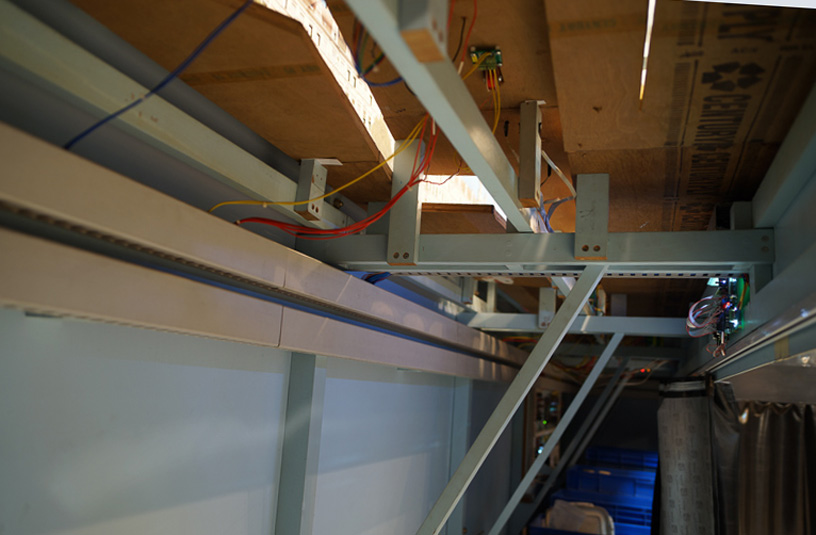
2×1 Risers screwed on to the stringers then support the 18mm subroadbed as seen here from below ……
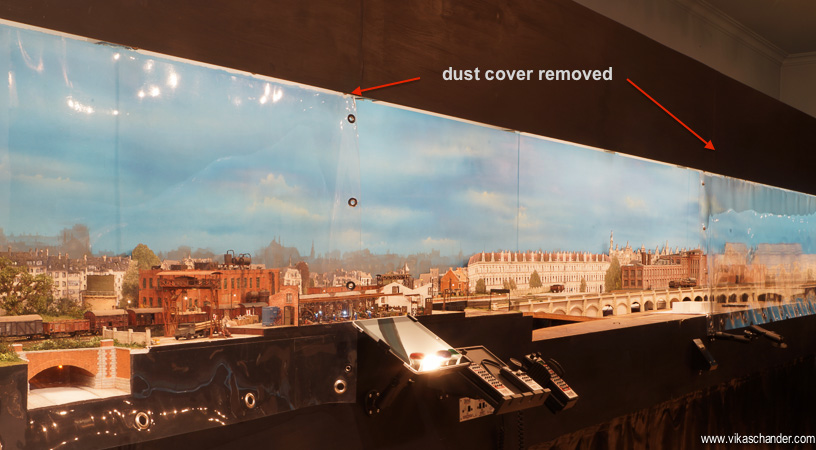
The upper cantilevered arm and its stringers support the 16 inch valance which is basically 5mm MDF….. MDF being flexible enough to round corners in about a 30 inch radius as seen at the far end of the valance…..I also installed a top cover so as to keep dust out, again of 5mm MDF.
4mm rod with threads at each end are anchored to the 2×2 pillars allows me to compensate for any stoop which may occur due to the weight of the valance on the cantilevered arm . The piping rigging seen, is for the smoke & fog effect system …..more of which in a later post …….
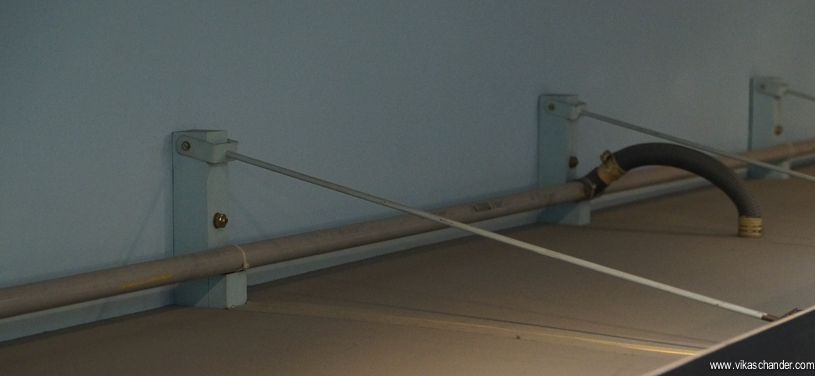
Behind this valance I have installed a combination of red, green, blue and 3200k incandescent lamps. RGB LED strips with self adhesive backing is also installed along with ultra violet tubelights. A couple of spotlights , strobe lights and a sound system is also suspended from the cantilevers/stringers….. more on the lighting & sound system in a separate post. I also installed cup hooks from which i can suspend plastic dust covers….
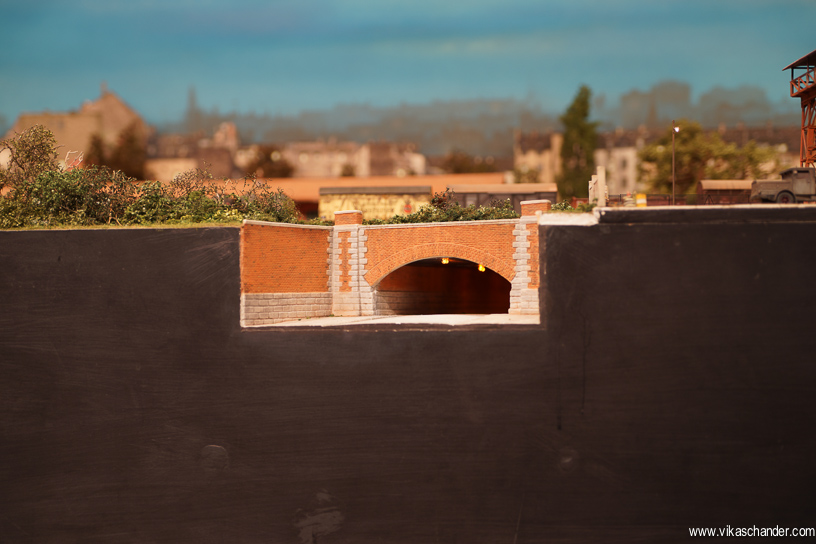
the lower cantilevered arm has stringers arranged in a manner so as to allow the attachment of a 15 inch fascia. The fascia is also made of 5mm MDF which again allows easy shaping and curving. Pre-planning the trackplan on 3rdPlanit helped locate the areas I needed to cut or shape into the fascia beforehand. Here we see a road underpass below the station throat which was cutout well before it was eventually put into place…….
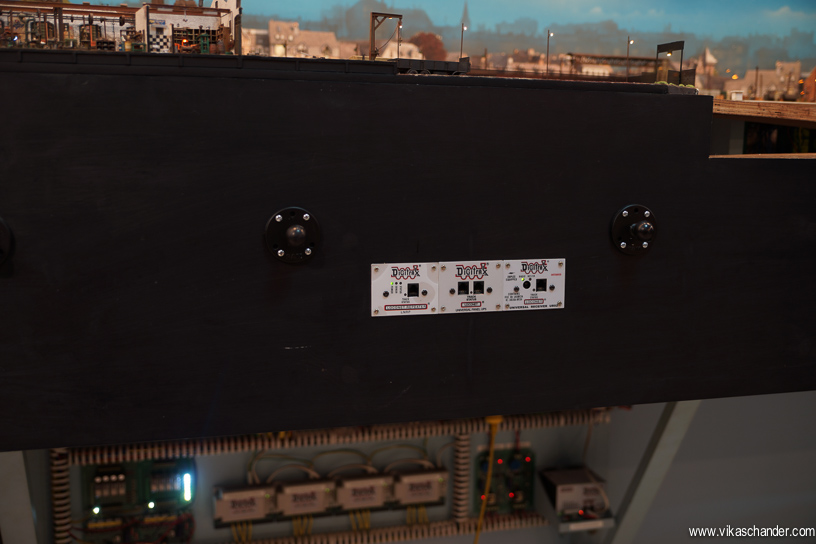
Upon this fascia, Digitrax UP-5, UR-92 and Loconet Repeater panels are mounted in four strategic locations – the main station, the industrial area, the rural area and the staging yard . Even though i use radio control, it is always re-assuring to know that i can plug-in at close range and regain control in case of a loss in signal or low battery situation.
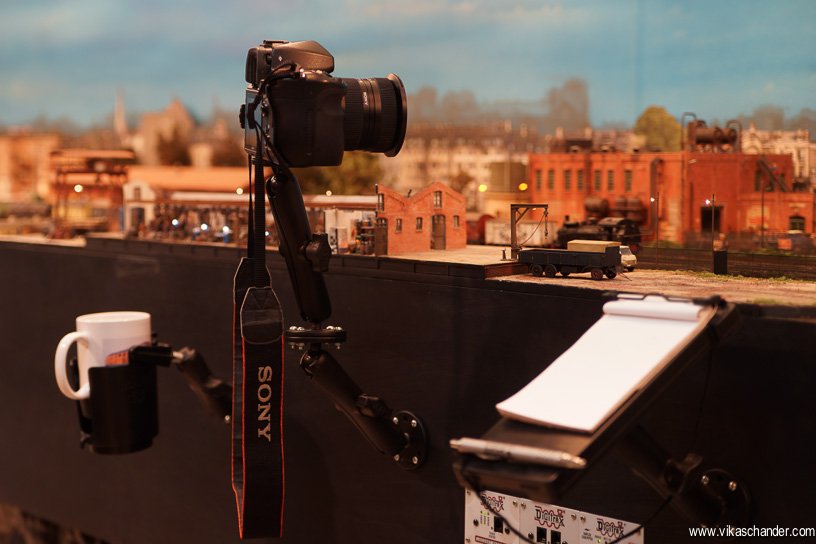
I also installed 1-inch Ram-mount balls ( see website ) anchored to the stringers behind the 5mm fascia board. This because the 5mm board on it’s own is not strong enough to hold the weight of whatever is mounted on the Ram-mounts.
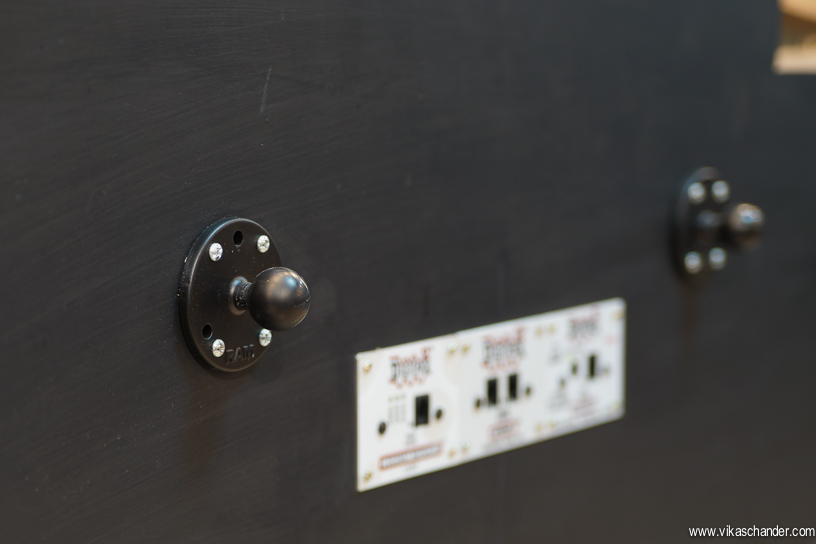
I can attach various Ram Mounts to these 1-inch ball mounts such as Ipad holders and throttle holders…
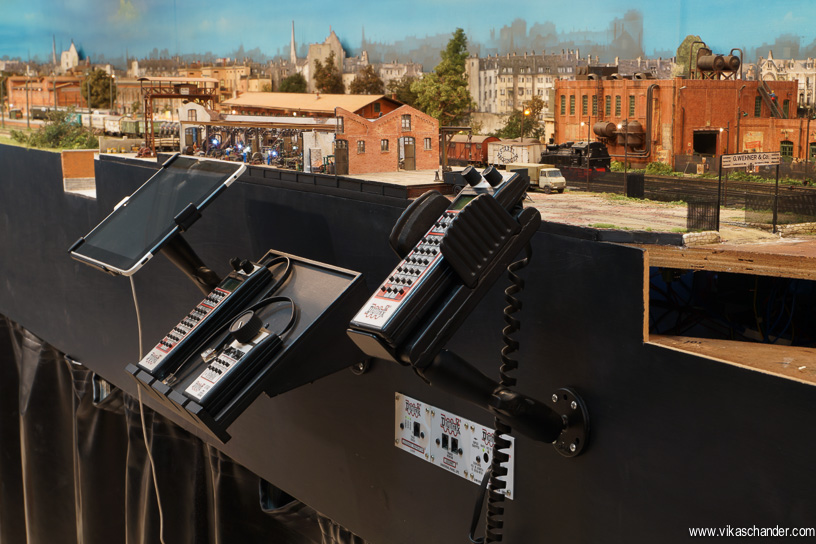
other mounts which I use are cup holders , tripod mounts and notepad mounts to name a few . I can also move these mounts to various locations as desired ….
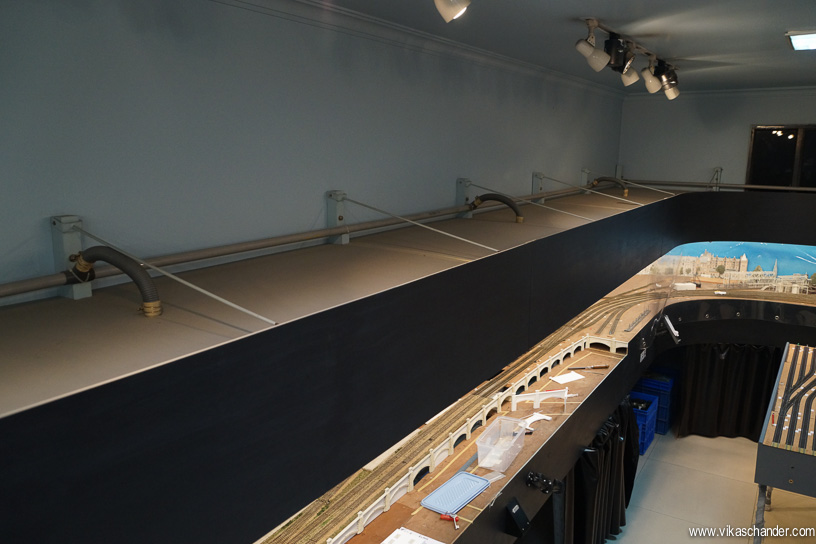
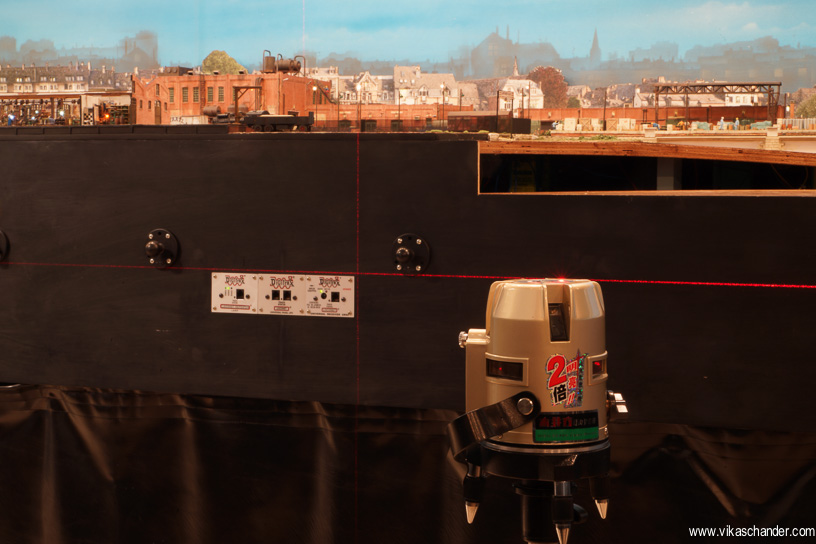
All fascia boards, digitrax panels and ram mounts were attached in a straight line and equidistant from the floor using a laser level marker ………
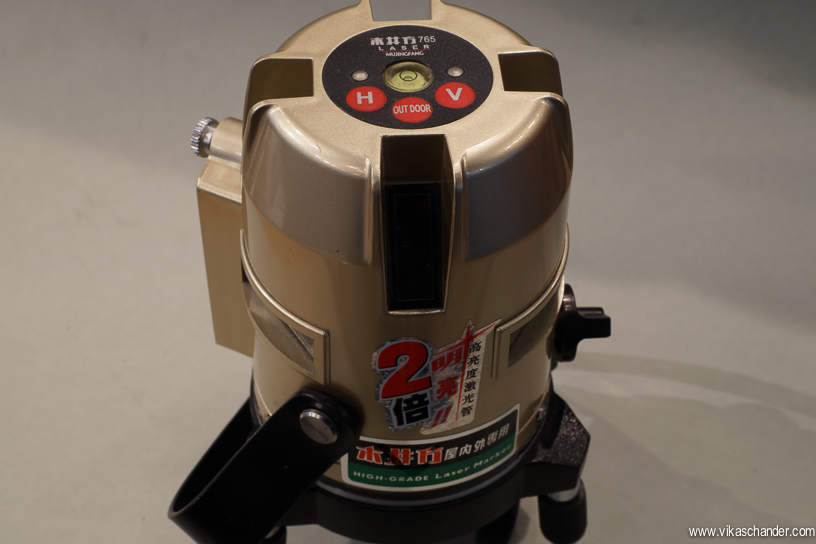
The laser level and marker helps keep things nicely squared up. The horizontal line is projected in a 360 degree arc so the reference is setup for the entire layout room in one go.
A black matte leather curtain suspended from the lower cantilever/valance hides the underneath of the layout giving it a clean finished look while clear plastic covers suspended from the upper cantilever/valance protects the layout from dust and prying hands ………
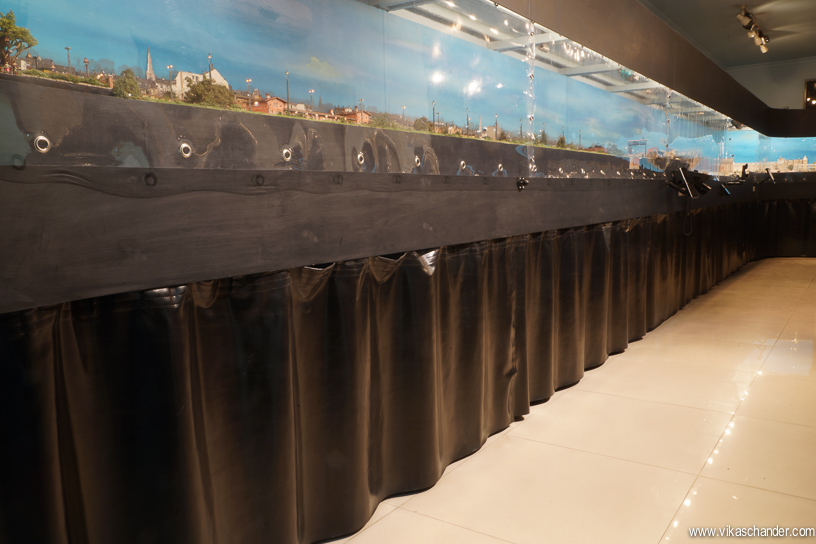
the clear plastic curtains are about eight feet in length and have snap buttons at each end. This allows me to work in a particular area by removing just one eight feet section rather than the entire length.
I guess the fascia and valance need a fresh coat of paint but i will hold off on that till the entire layout is done. The benchwork, fascia and valance has been in place for about three years now and has served it’s purpose well and gives the layout a neat finished look even though it is far from complete………
Having come across your website and blog quite by chance, I am amazed at the quality of the craftsmanship seen in both your layout and the others described.
I am particularly impressed by the pillar/cantilever arms shown here. I will be producing something similar for my home based layout (1910 UK London and South Western Railway) that is just less than three metres long…. so that is just four supports that will carry three separate board modules.
The only difference to the design will be that the top of the board carrying element will be flat and wide enough to allow the modules to be lifted through 90 degrees onto their back edge to provide easy access to the underside. This is particularly important when using mechanical point and signal operating methods.
I might also produce a smaller version of the bracket system for a small, long and narrow modular FiNe layout for my German stock.
Most interesting.
Maurice
Highly commendable work of art. Brilliant in conception and execution. The work of a true artist and master of his art.
The transparent dust cover is a genius idea by itself. Without removing the dust cover, you can still operate the trains esp. when you have lots of visitors. No hands could touch your layout.
Jimmy
The Ram mounts are a great idea. I specially like how you can set up a camera mount.
Vikas, you’ve been there and done that! And now you are recording every step with illustrations so that those of us who have no clue where to begin, know how it’s done. You’ve gone great lengths to get the smallest of things right, and now you are sharing your method with everyone through this blog. Hats off to you!
This is a very good example of Modelmeister Chander’s continual quest for perfection.
Vikas,
As always, I have been watching your blog and how you go about doing things and I have to say that everything you do is second to none. You have given me many ideas on how to incorporate construction methods into my own ‘Free-Mo’ modules. Thanks for sharing.
As usual, great craftsmanship and extraordinary industrialization – I am learning a lot from your methods and will definitely incorporate them in my next project. Keep the updates coming! 🙂
Vikas , your layout and layout area are second to none , well thought through and well executed.
Wow!
Your benchwork and finish is inspiring. I think I have my method of building my layout! You are the gold standard in “doing it right!”. The quality of your layout on top shows that the foundation is equally as good.
Thank you for posting this and you have given me a lot of ideas and motivation to go the extra mile on my benchwork!!
Cheers!
Darryl