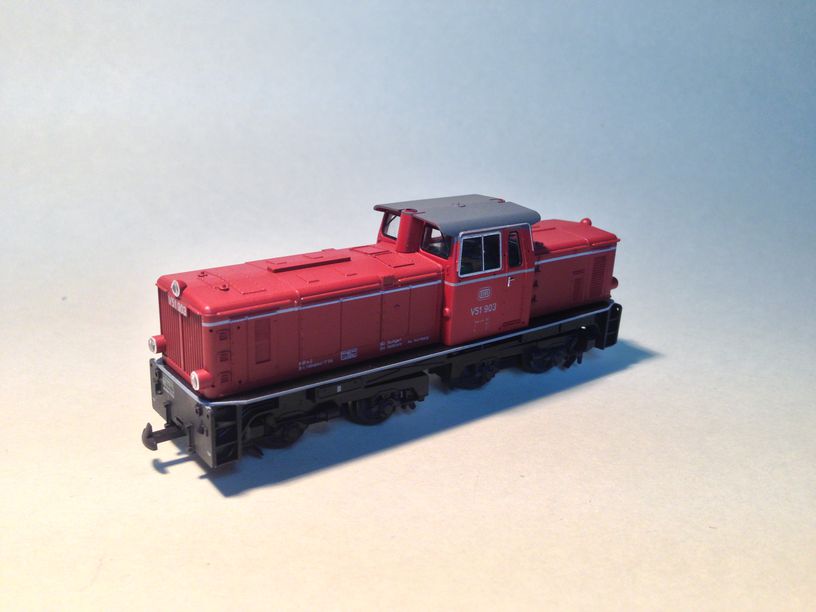
One rainy Saturday afternoon my buddy and partner in crime , RDX – Ranjeev Dubey turns up with a HOe narrow gauge diesel loco in tow . He very nonchalantly says that he has totalled the motor in it and now wants to re-motor it . While we are it he also wants to add a sound decoder in it.
I shudder at the thought as in the past i had tried my hand at re-motoring a rail bus and had damaged it beyond repair. Anyhow , i had Ranjeev sign a disclaimer that in case further damage was caused to the loco , i would not be responsible. Upon removal of the hood i realized that i had probably bitten of more than i could chew …….
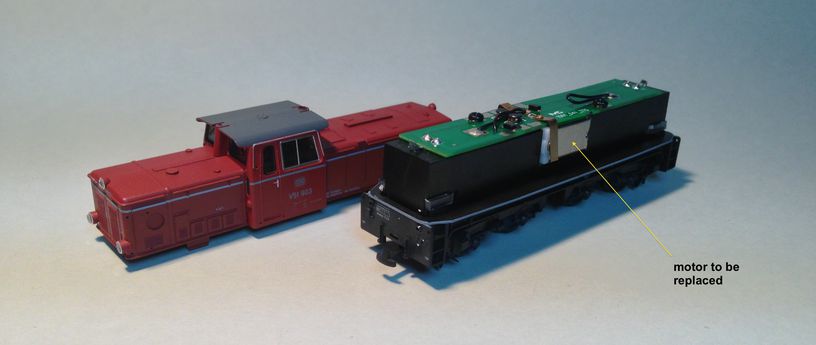
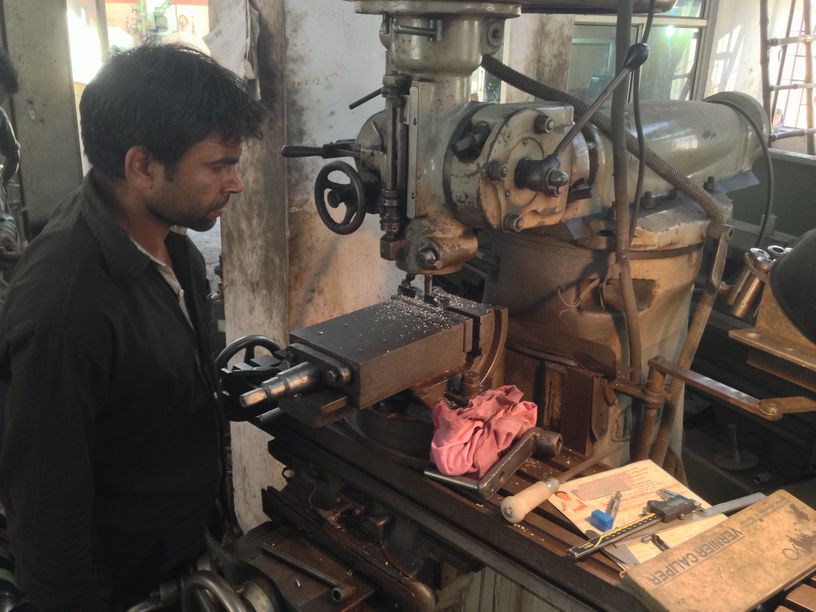
The replacement motor was from SB Modellbau , a firm in germany which provides Maxon and Faulhaber motors along with instructions on how to refit locos with new motors . The instructions called out for milling the metal frame so off we went to the a nearby metal shop along with our vernier calipers and magnifying headsets …… No!!…..thats not RDX in the pic …
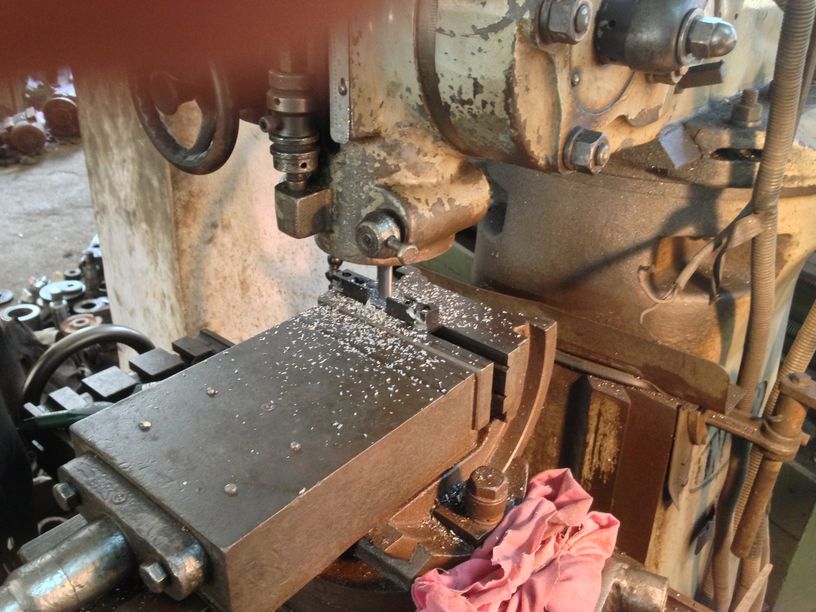
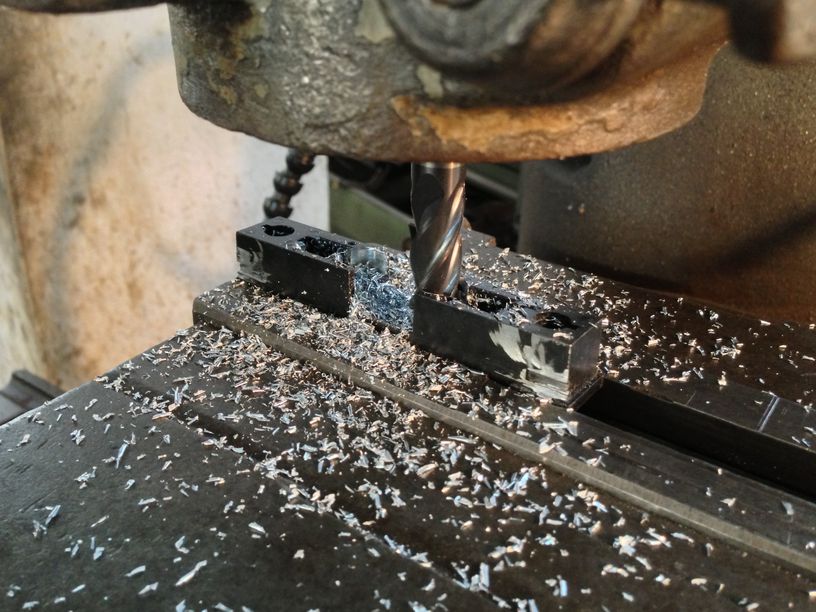
and there it was ……milled the way we wanted it …….
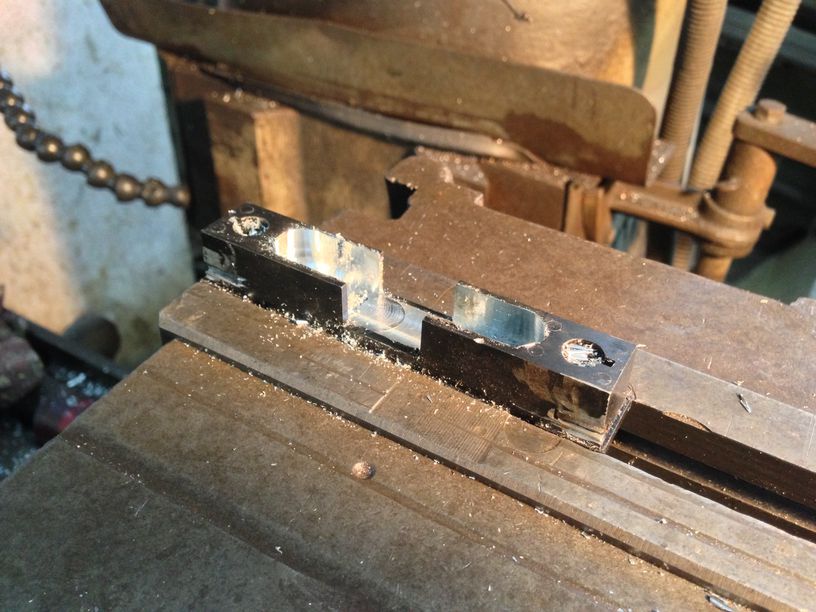
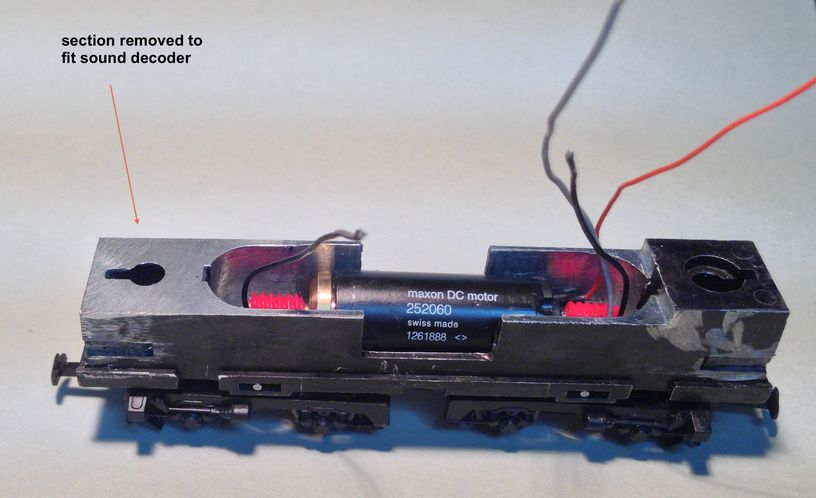
we test fitted the motor and there was still a little more milling required but finally we managed to get the job done and fit in the motor perfectly …… fixing it in place with epoxy…..
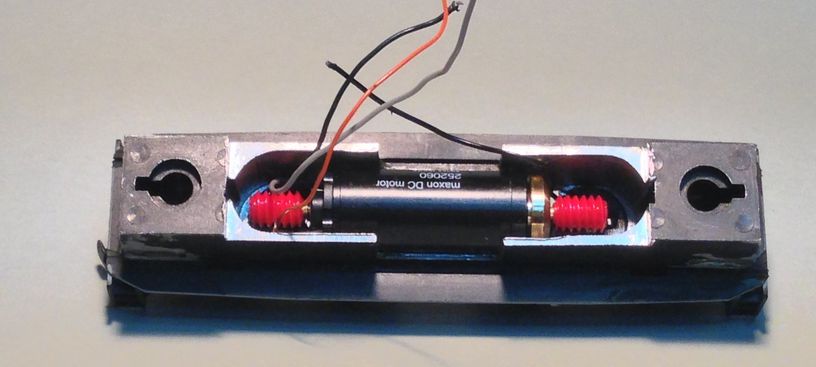
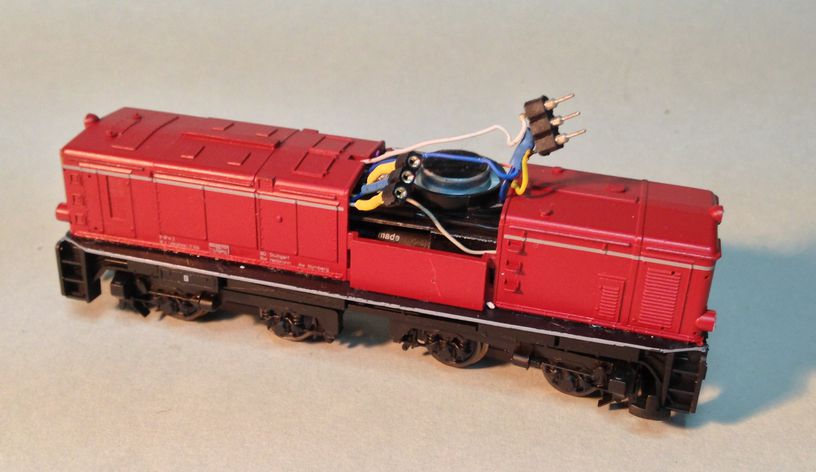
However , i soon realized that more milling was required if we were to fit in a sound decoder with a loudspeaker……..
……but by now the metal shop was closed so we were on our own . No worries !!!…… i whipped out my Delta belt sander ……..

and sanded away the part which was in the way ……
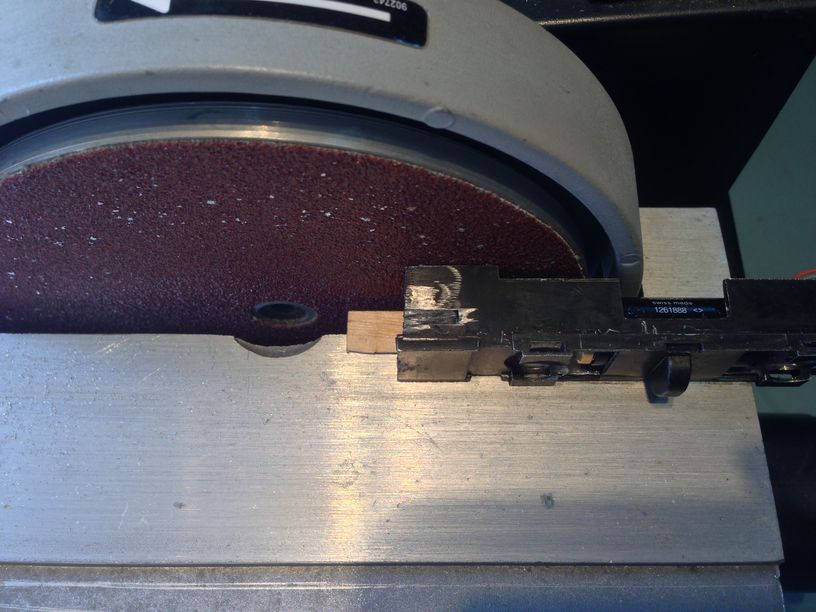
I learnt first hand how hot, metal can get when rubbed against another surface ….. Ouch !!! …. anyhow we finally got to where we wanted to be …….
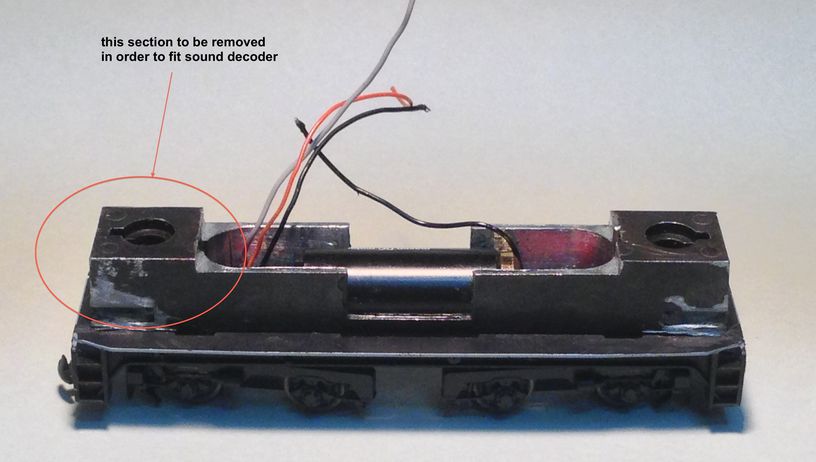
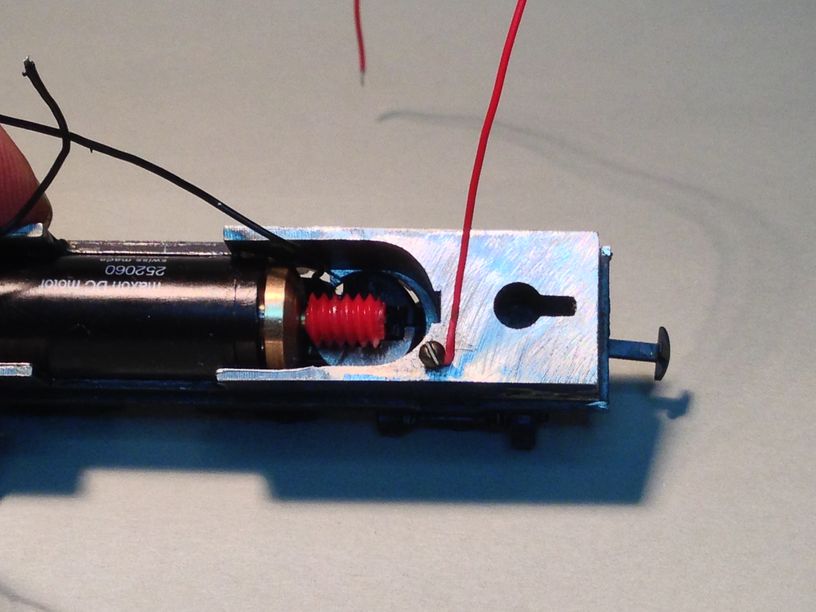
this loco has one side of the wheel sets picking up current and passing it to the metal body so we needed to tap in a screw to hold the pickup wire …. red in our case
i then added a 0.5mm plastic sheet, painted black to form a base to rest the decoder on …..

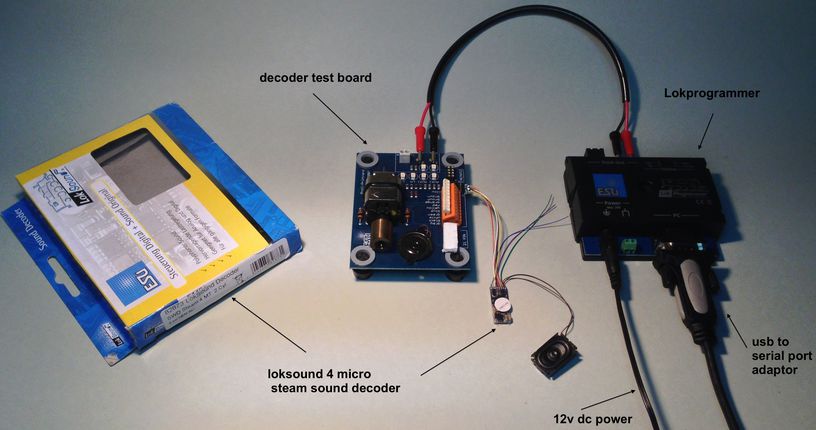
the decoder which Ranjeev had was a Loksound micro v4 with steam sounds filled in . We downloaded the appropriate sound files for this diesel loco and using the Lokprogrammer and a computer loaded up the sounds into the decoder …

i then proceeded to solder in the wires and fit the decoder being as neat as i could possibly be ……
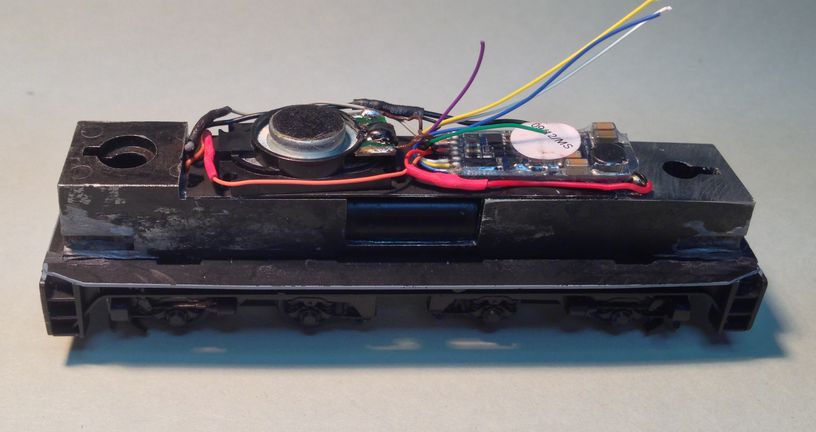
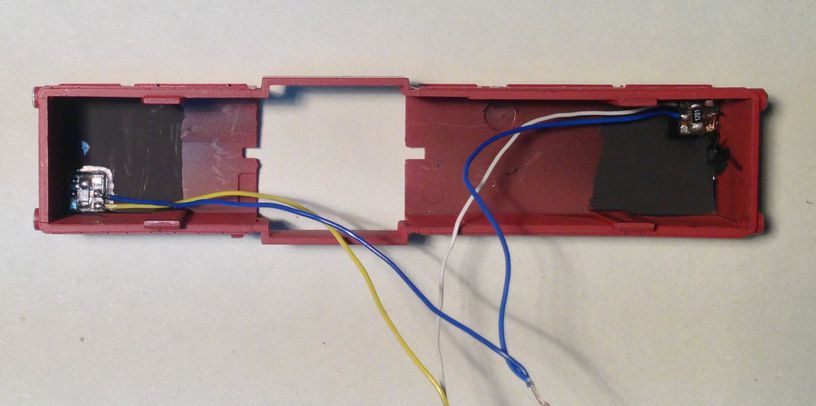
we decided to add headlights using a resistance board and micro leds ……
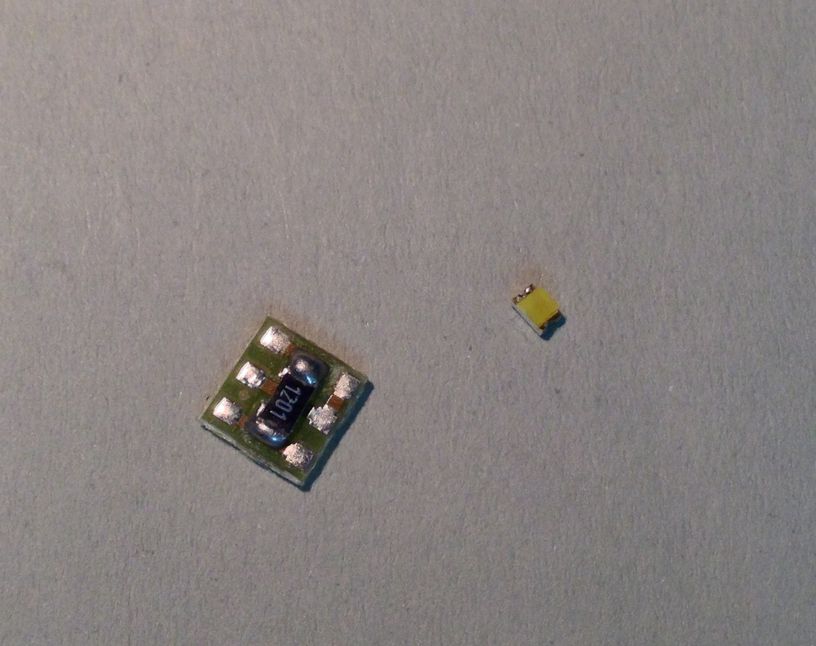
we glued in the leds and resistance board taking care to mask off the adjoining area with black paint so there would be no light bleed thru …..
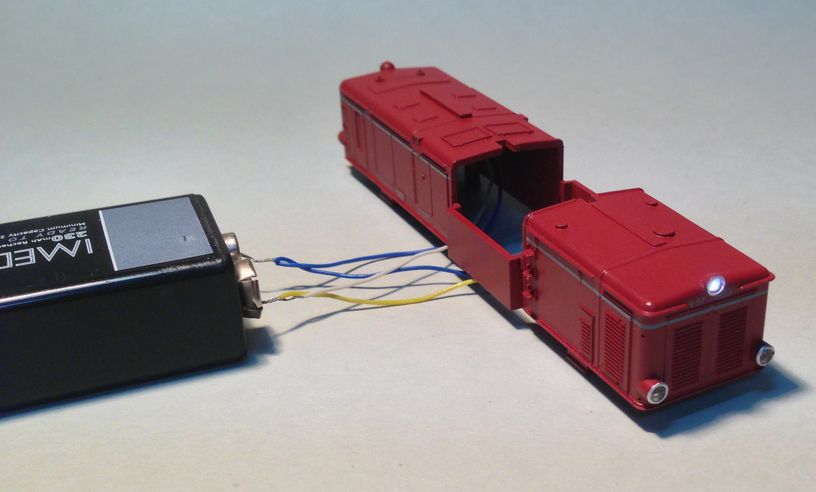
and tested it with a 9v battery ……
i then put back the hood and added a 3 pin plug for the lights …… since the lights were on the plastic hood i needed this plug in case the hood was to be separated from the body at some point in the future …….
luckily there was some space at the sides of the loco and i was able to snug up the 3 pin plug into it …..
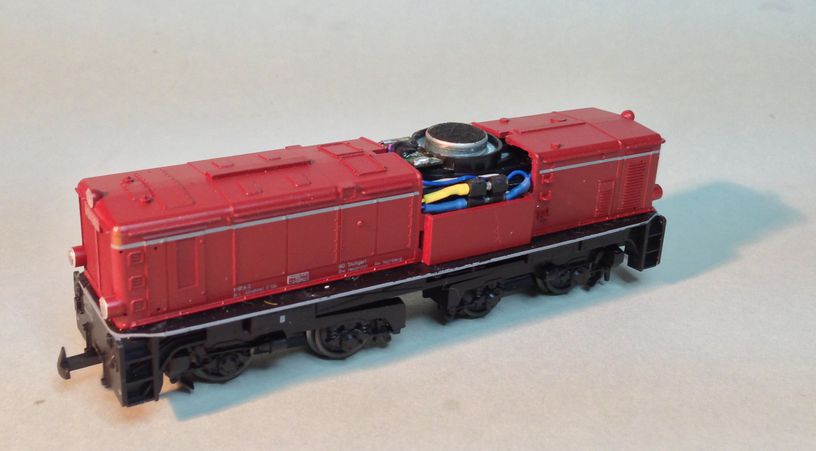
finally i put the driving cab on to give a neat and clean install …….
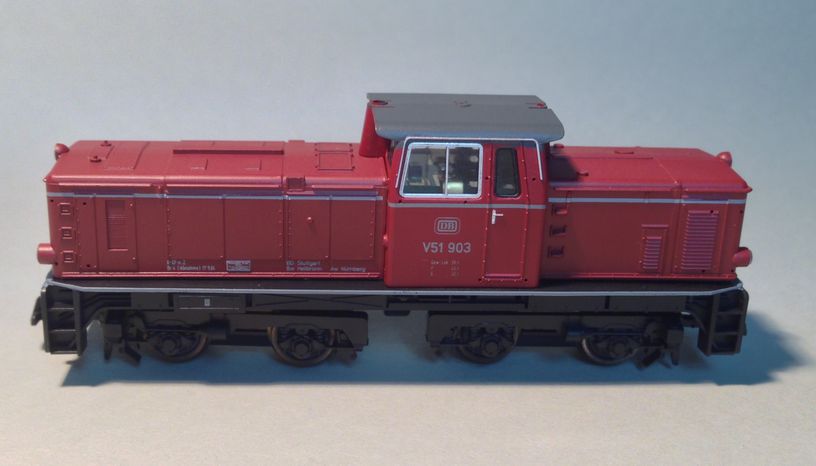
Last i saw , the loco runs well and sounds good too ……..
Thank You :-)))
Some time ago I converted a BEMO V 51 in a Brohltal D4:
http://www.aw-cannstatt.de/images/d4_sml.jpg
Recently Holger Riedel spotted another Weinert P 8 on a beautiful FREMO mudule:
http://www.aw-cannstatt.de/webimages/img_2311.jpg
cheers
Ah!!…. “TSL” – Thomas-Steffen-Langner …. the ultimate model builder !! the king of Weinert
good to hear from you , my friend…. i see that your sense of humour has not deserted you …
The safety goggles and earplugs come at an extra cost which we did not want to pay for hence the milling operator did not use them …
the next smallest milling machine was in scale 1:87 so that did not come in use either…:-)
on a more serious note … i must post an article on your weinert locos and let people here in India know what a master builder you are …soon i will do that .
cheers
vikas
You choosed one of Bemo’s early locos which is hard to convert because it is just a brick of metal.
I am impressed of the milling machine in the metal shop. I am quite sure that there was no smaller grinder in the whole shop. And yes, safety goggles an earplugs are strictly optional for all workers. But anyway he did a good job. I am sorry I had to safe these pics 🙂
Remember: model engineering is always dead slow!
Carry on!
Thomas
dubey sahib ,
behind every successful decoder install are two nutcases ……
without you it wud not have been possible
glad u enjoyed the longhorning …..
vikas
This project requires five central quality all of which Model Meister VC has in abundance (a) Clarity of conception, (b) The skill necessary to communicate effectively with a semi literate but highly experienced metal worker, (c) the ability to work with micro electronics (more on that in a bit) (d) infinite patience to work through problems, and (e) balls of steel.
I thought the show was over when we did the milling and ended up with a motor floor no thicker than a micron! But it went on bit by bit. When we got to the motor, it would not turn both bogie worms equally in a balanced way. No problem: VC was back at milling…. When we got to the decoder housing, I thought the lack of space meant the end of the road but not at all, VC had dismantled the loco for the 4th time and was sanding it himself using one of his innumerable stock of exotic machines that seem to serve no useful function…
Somewhere in all this, he also decided that he has a fundamental philosophical disagreement with grain of wheat bulbs, so he replaced them with LEDs. I thought he was headed for a deep self inflicted wound but not at all, it all went off beautifully.
Oh, and by the way, the job started mid morning and was done by 8 pm, more or less…
Most impressive I can tell you. More accurately, deeply intimidating. A lot of us will never reach this depth of knowledge or level of skill.
A pleasure to watch you do this Sirjee!